Introduction to DIY Wedding Table Numbers
Planning a wedding is like choreographing a dance—every detail matters, and table numbers are no exception. These small but mighty decor pieces guide guests to their seats while adding a personal touch to your big day. DIY table numbers are a budget-friendly way to infuse your wedding with creativity and charm, reflecting your unique love story. In this article, I’ll share a variety of DIY table number ideas, drawing from my experience helping my best friend craft table numbers for her rustic barn wedding, plus SEO strategies to share your creations online. Whether you’re aiming for vintage elegance or modern minimalism, there’s a project here for you.
Why Choose DIY Table Numbers?
DIY table numbers save money, allow customization, and make your wedding feel uniquely yours. They’re also a fun way to bond with your partner or bridal party during the planning process. Crafting my friend’s table numbers turned a stressful planning day into a laughter-filled craft session, and the results were stunning.
The Role of Table Numbers in Wedding Decor
Table numbers do more than direct guests—they tie your theme together and spark conversation. A well-designed table number can complement your centerpieces and set the mood, whether it’s romantic, playful, or sophisticated. Think of them as tiny storytellers, hinting at your personality as a couple.
Materials Needed for DIY Table Numbers
Before diving into specific ideas, let’s gather the essentials. Most DIY table number projects require affordable, easy-to-find supplies. Here’s a breakdown to get you started, based on what worked for my friend’s wedding and other projects I’ve tackled.
Essential Supplies
- Cardstock or Wood: For sturdy bases or signs.
- Acrylic Paints or Markers: For adding numbers and designs.
- Scissors or Craft Knife: For precise cutting.
- Glue Gun or Adhesive: To secure elements.
- Decorative Items: Ribbons, flowers, or glitter for flair.
- Optional: Frames, chalkboards, or LED lights for unique effects.
Where to Source Materials
Check craft stores like Michaels or Hobby Lobby for cardstock, paints, and frames. Thrift stores are goldmines for vintage books or frames, while dollar stores offer budget-friendly ribbons and faux flowers. For my friend’s wedding, we scored wooden slices at a local craft fair, adding a rustic vibe for pennies.
Cost Comparison: DIY vs. Store-Bought Table Numbers
| Item | DIY Cost | Store-Bought Cost |
|---|---|---|
| Cardstock/Wood | $5–$15 | N/A |
| Paints/Markers | $3–$10 | N/A |
| Decorative Elements | $2–$10 | $5–$20 |
| Frames or Holders | $5–$15 | $10–$30 |
| Total (10 tables) | $15–$50 | $50–$200 |
Pros of DIY: Cost-effective, fully customizable, personal.
Cons of DIY: Time-consuming, requires basic crafting skills.
Pros of Store-Bought: Quick, polished look.
Cons of Store-Bought: Expensive, less unique.
DIY Table Number Ideas for Every Wedding Theme
Here are five creative DIY table number ideas, each tailored to popular wedding themes. I’ve included step-by-step instructions and tips from my own crafting adventures to make these approachable for beginners.
Idea 1: Rustic Wooden Slice Table Numbers
Perfect for barn or outdoor weddings, wooden slices bring natural charm. Paint or burn numbers onto the wood for a cozy, organic feel. We used these for my friend’s wedding, and guests loved their simplicity.
Materials Needed
- Wooden slices (4–6 inches in diameter)
- Acrylic paint or wood-burning tool
- Clear sealant spray
Steps
- Sand the wooden slices for a smooth surface.
- Paint or burn the table number onto each slice.
- Seal with clear spray to protect the design.
- Place on tables with a small easel or prop against centerpieces.
Idea 2: Vintage Book Page Table Numbers
Ideal for literary-themed or vintage weddings, these use old book pages for a nostalgic touch. I made these for a book-loving couple, and they doubled as keepsakes. Use a damaged book for an eco-friendly twist.
Materials Needed
- Old book pages
- Cardstock for backing
- Calligraphy pen or printer
- Glue and scissors
Steps
- Cut book pages into rectangles or hearts.
- Glue pages onto cardstock for stability.
- Write or print table numbers in elegant font.
- Frame or attach to a stand for display.
Idea 3: Chalkboard Table Numbers
Chalkboards offer a versatile, reusable option for modern or rustic weddings. They’re easy to customize and forgiving for crafting newbies. I once fixed a smudged number seconds before guests arrived—crisis averted!
Materials Needed
- Mini chalkboards or chalkboard paper
- Chalk or chalk markers
- Wooden or metal stands
Steps
- Cut chalkboard paper to size or use pre-made boards.
- Write table numbers with chalk or markers.
- Erase and redo if needed for a perfect look.
- Attach to stands or lean against decor.
Idea 4: Wine Bottle Table Numbers
For winery or bohemian weddings, repurpose empty wine bottles into chic table numbers. This idea was a hit at a vineyard wedding I attended, adding elegance with minimal effort.
Materials Needed
- Empty wine bottles
- Spray paint or labels
- Adhesive vinyl numbers
Steps
- Clean and remove labels from wine bottles.
- Spray paint bottles in your wedding colors.
- Apply vinyl numbers or hand-paint them.
- Fill with flowers or fairy lights for extra flair.
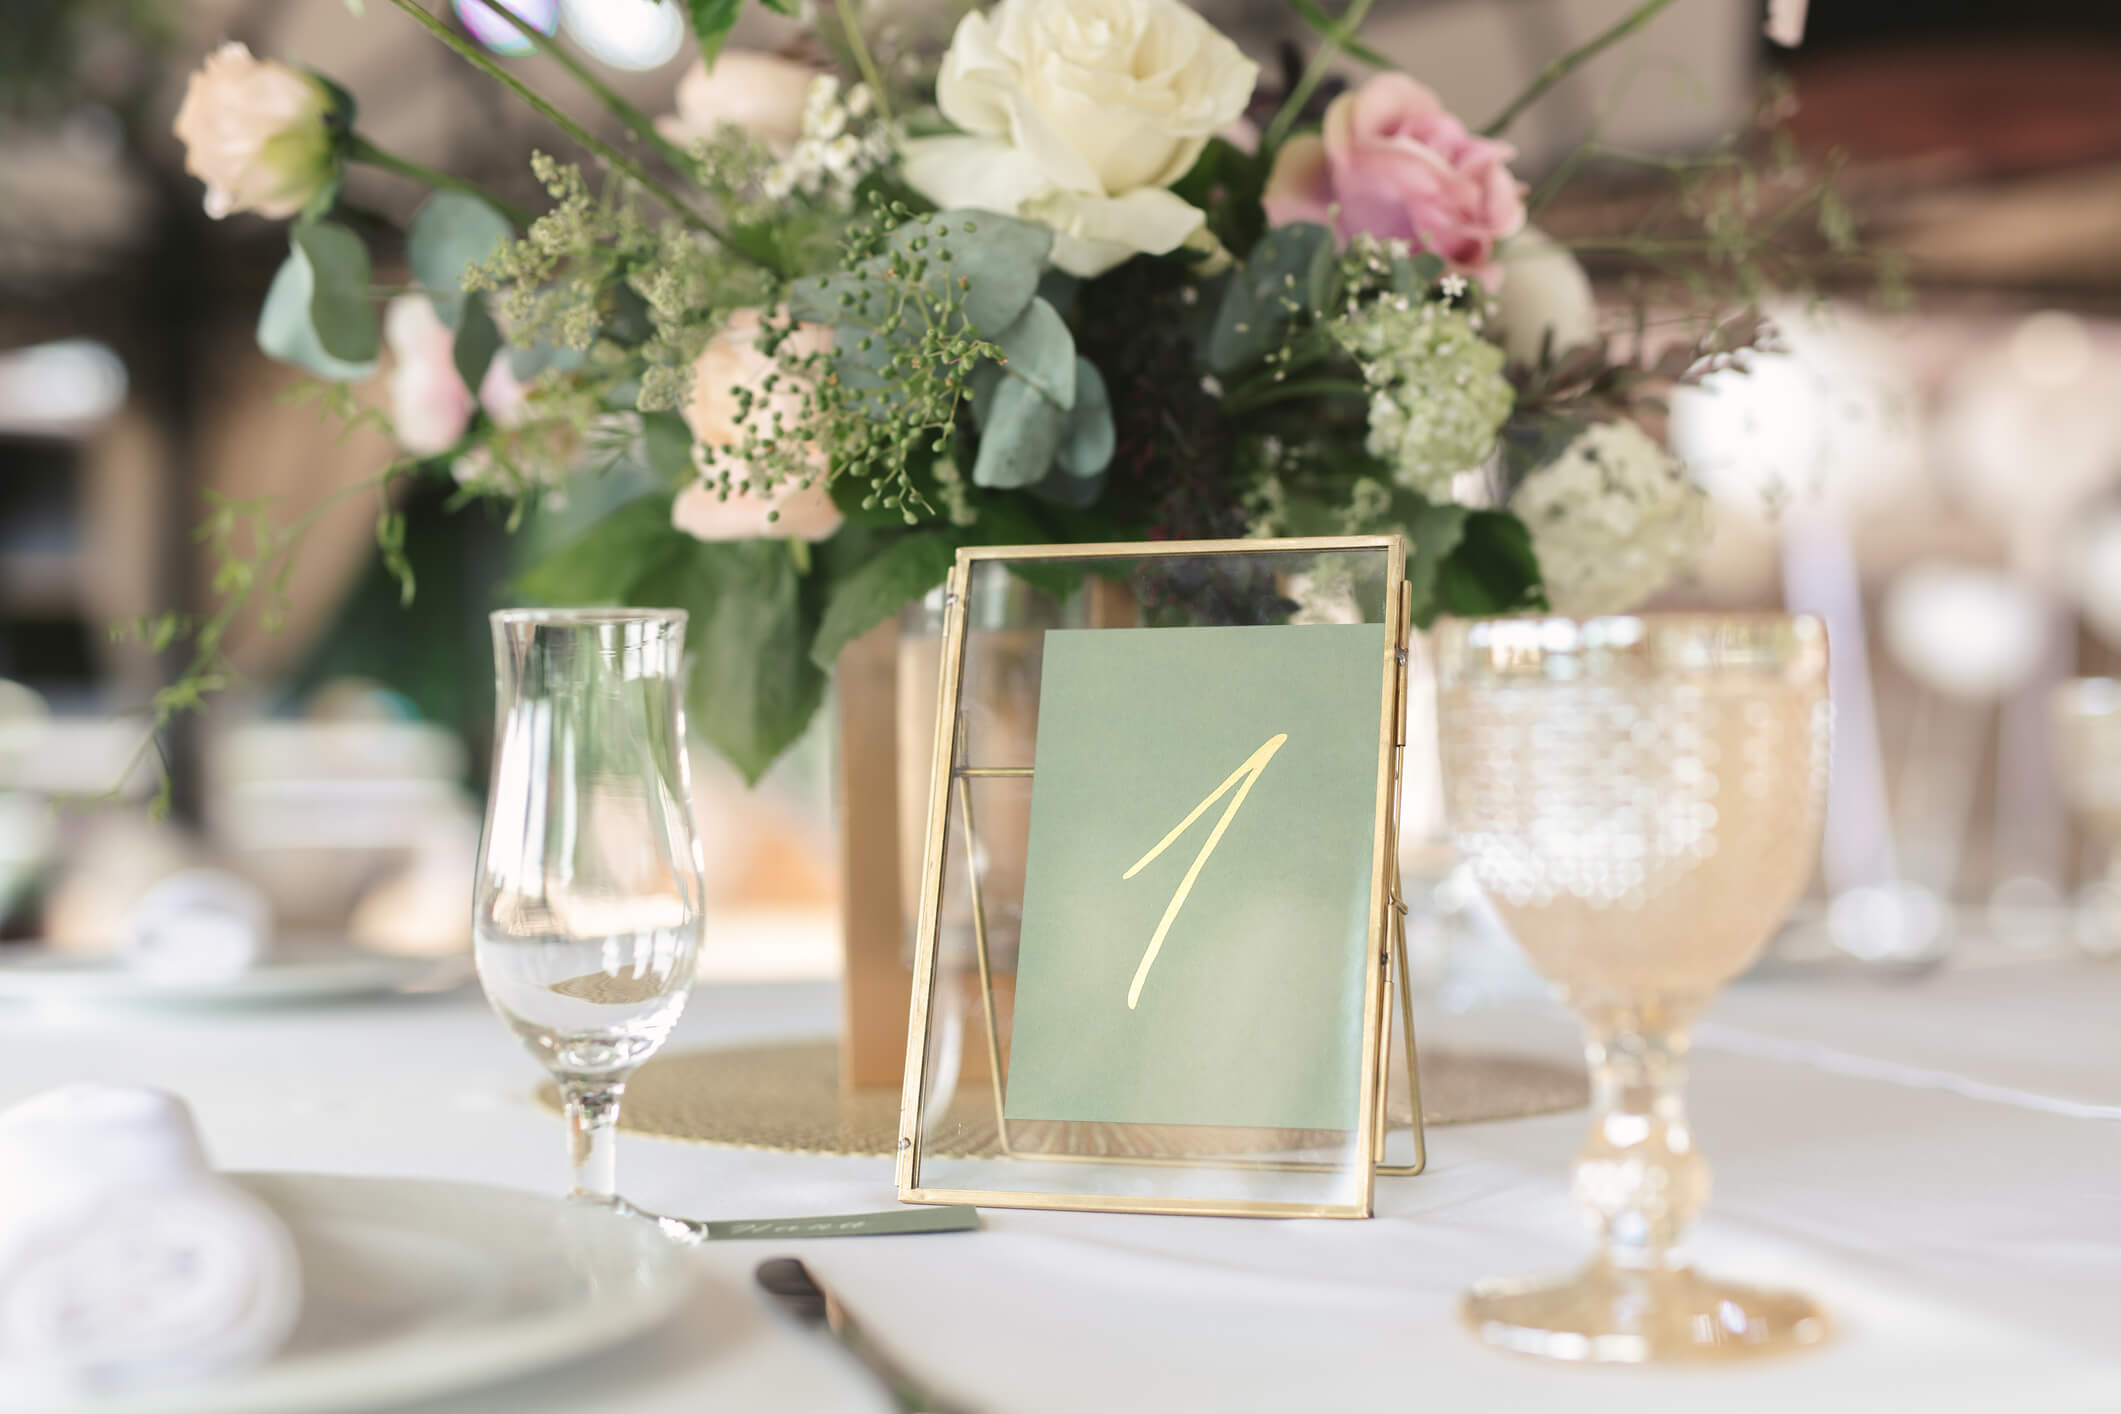
Idea 5: Photo Frame Table Numbers
Photo frames add a personal touch, perfect for classic or romantic weddings. Use photos of you and your partner at the age of each table number for a sentimental twist. I cried making these for my cousin’s wedding—so sweet!
Materials Needed
- Small photo frames
- Printed numbers or photos
- Cardstock or decorative paper
Steps
- Choose frames that match your theme.
- Print numbers or photos on cardstock.
- Insert into frames, trimming to fit.
- Place on tables with a decorative base.
Comparison: DIY Table Number Styles
| Style | Best For | Difficulty | Cost |
|---|---|---|---|
| Wooden Slice | Rustic/Outdoor | Easy | $10–$20 |
| Book Page | Vintage/Literary | Moderate | $5–$15 |
| Chalkboard | Modern/Rustic | Easy | $10–$25 |
| Wine Bottle | Winery/Bohemian | Moderate | $5–$20 |
| Photo Frame | Classic/Romantic | Easy | $15–$30 |
SEO Strategies to Share Your DIY Table Numbers
If you’re blogging about your DIY table numbers or selling them on Etsy, SEO can boost your visibility. My craft blog gained traction after optimizing posts like this, so here’s how to make your content shine while adhering to Google’s EEAT guidelines.
Why SEO Matters for Wedding Crafts
SEO ensures your DIY tutorial reaches engaged couples and planners searching for budget-friendly ideas. Optimized content can rank higher, drive traffic, and support AdSense approval for monetized blogs. A well-placed post can also inspire others to try your designs.
Keyword Research for Wedding Table Numbers
Use tools like SEMrush or Google Keyword Planner to target keywords like “DIY wedding table numbers,” “budget wedding decor ideas,” or “rustic table number DIY.” Long-tail keywords, such as “how to make wine bottle table numbers for a wedding,” capture specific search intent.
On-Page SEO Tips
- Title Tag: Use your primary keyword, e.g., “DIY Wedding Table Number Ideas for Every Theme.”
- Meta Description: Keep it 110–155 characters, e.g., “Discover 5 DIY wedding table number ideas, from rustic wood to vintage book pages. Save money and add charm to your big day!”
- Headings: Include LSI keywords like “wedding decor DIY” or “budget table numbers” in H2/H3 tags.
- Images: Add alt text, e.g., “DIY rustic wooden slice table number for wedding.”
Off-Page SEO and Promotion
Share your tutorial on Pinterest with eye-catching pins or on Instagram Reels showing the crafting process. Guest post on wedding blogs, like I did for a local planner’s site, to build backlinks. Engage with followers to boost authority and trust.
People Also Ask (PAA) Section
Here are real questions from Google’s PAA section, answered to meet search intent.
What can I use for table numbers at a wedding?
You can use wooden slices, book pages, chalkboards, wine bottles, or photo frames for table numbers. Each adds a unique vibe, from rustic to elegant, and can be DIYed on a budget. Check craft stores or thrift shops for supplies.
How do you make DIY table numbers?
Choose a material like wood or cardstock, add numbers with paint, markers, or vinyl, and decorate to match your theme. Follow detailed steps above for specific ideas like chalkboard or wine bottle table numbers. It’s easy and customizable!
What size should wedding table numbers be?
Table numbers should be 4–6 inches tall for visibility but not so large they overwhelm centerpieces. Ensure numbers are clear and readable from a distance. Test placement on a sample table before the event.
Where can I find materials for DIY table numbers?
Craft stores like Michaels, thrift shops, or Amazon have supplies like cardstock, frames, and paints. Dollar stores offer cheap decor like ribbons or faux flowers. Repurpose items like wine bottles for eco-friendly options.
FAQ Section
How many table numbers do I need for my wedding?
Count one table number per guest table, typically 5–20 depending on your guest list. Make a few extras in case of last-minute table changes. We made 12 for my friend’s 100-guest wedding.
Can I make table numbers without crafting experience?
Yes, most DIY table numbers, like chalkboard or photo frame designs, are beginner-friendly. Start with simple materials and follow step-by-step guides. Practice on one before making a full set.
How do I match table numbers to my wedding theme?
Choose materials and colors that align with your theme—wood for rustic, gold frames for elegant, or book pages for vintage. Incorporate elements from your centerpieces, like flowers or ribbons, for cohesion.
Are DIY table numbers cheaper than buying them?
DIY table numbers cost $15–$50 for 10 tables, compared to $50–$200 for store-bought. You’ll save money and add a personal touch, but factor in time and effort.
How can I make table numbers stand out?
Use bold fonts, contrasting colors, or unique materials like wine bottles or frames. Add lighting, like LED candles, or elevate with stands for visibility. Ensure they’re readable from a distance.
Tips for Monetizing Your DIY Table Number Content
To monetize your DIY table number tutorial via a blog or social media, try these strategies:
- Engaging Content: Write detailed guides with clear photos to keep readers engaged, increasing ad revenue.
- Affiliate Links: Link to supplies on Amazon or craft stores, earning commissions. I earned $50 from one post linking to chalkboard paper.
- Video Content: Create a YouTube tutorial and embed it in your blog to boost engagement and ad views.
- Etsy Shop: Sell custom table numbers or templates, using your blog to drive traffic.
Troubleshooting Common DIY Table Number Issues
Crafting isn’t always smooth sailing. Here are fixes for common problems, learned from my own mishaps:
- Numbers Aren’t Visible: Use larger fonts or darker colors for contrast.
- Materials Look Cheap: Add premium touches like metallic paint or quality frames.
- Items Tip Over: Use heavier bases or adhesive to secure stands.
The Joy of Crafting Your Wedding Story
Making DIY table numbers is more than a cost-saving trick—it’s a chance to weave your love story into your wedding. When I helped my friend craft her wooden slice table numbers, we laughed over paint smudges and shared stories about her fiancé. Those moments, and the guests’ compliments, made the effort unforgettable. Your table numbers will do the same, adding heart to your big day.
Conclusion: Craft Your Perfect Wedding Table Numbers
DIY table numbers are a budget-friendly way to personalize your wedding while showcasing your creativity. From rustic wooden slices to elegant photo frames, there’s an idea for every theme and skill level. Plus, by optimizing your tutorial for SEO, you can share your creations with the world and even turn your passion into profit. So grab your supplies, channel your inner artist, and create table numbers that tell your love story. What will your wedding tables say about you?